
Setting up a gaming space that keeps up with high-level competition takes more than just grabbing the newest gear. A poorly organized room or overlooked power issue can make even the best hardware fall short. For ambitious players eyeing serious tournaments, getting your environment right from the start creates a strong foundation for skill growth and stress-free gameplay. This guide will help you identify and address critical factors in your gaming setup, making every practice and match smoother and more comfortable.
$ads={1}
{getToc} $title={Table of Contents}
Quick Summary
| Key Insight | Explanation |
|---|---|
| 1. Assess Your Gaming Space | Evaluate dimensions, power, lighting, and airflow before setting up your equipment to avoid costly mistakes. |
| 2. Prioritize Essential Equipment | Focus on core components like a gaming PC, monitor, and peripherals that enhance performance and comfort during long sessions. |
| 3. Optimize Hardware and Software Settings | Fine-tune your settings for graphics and audio to reduce input lag and improve responsiveness, directly affecting your competitive edge. |
| 4. Test and Fine-Tune Your Setup | Conduct gameplay tests to identify discomforts or distractions and adjust settings one variable at a time for optimal performance. |
| 5. Document Everything for Future Reference | Keep records of monitor height, settings, and layout to easily recreate the optimal gaming environment before competitions. |
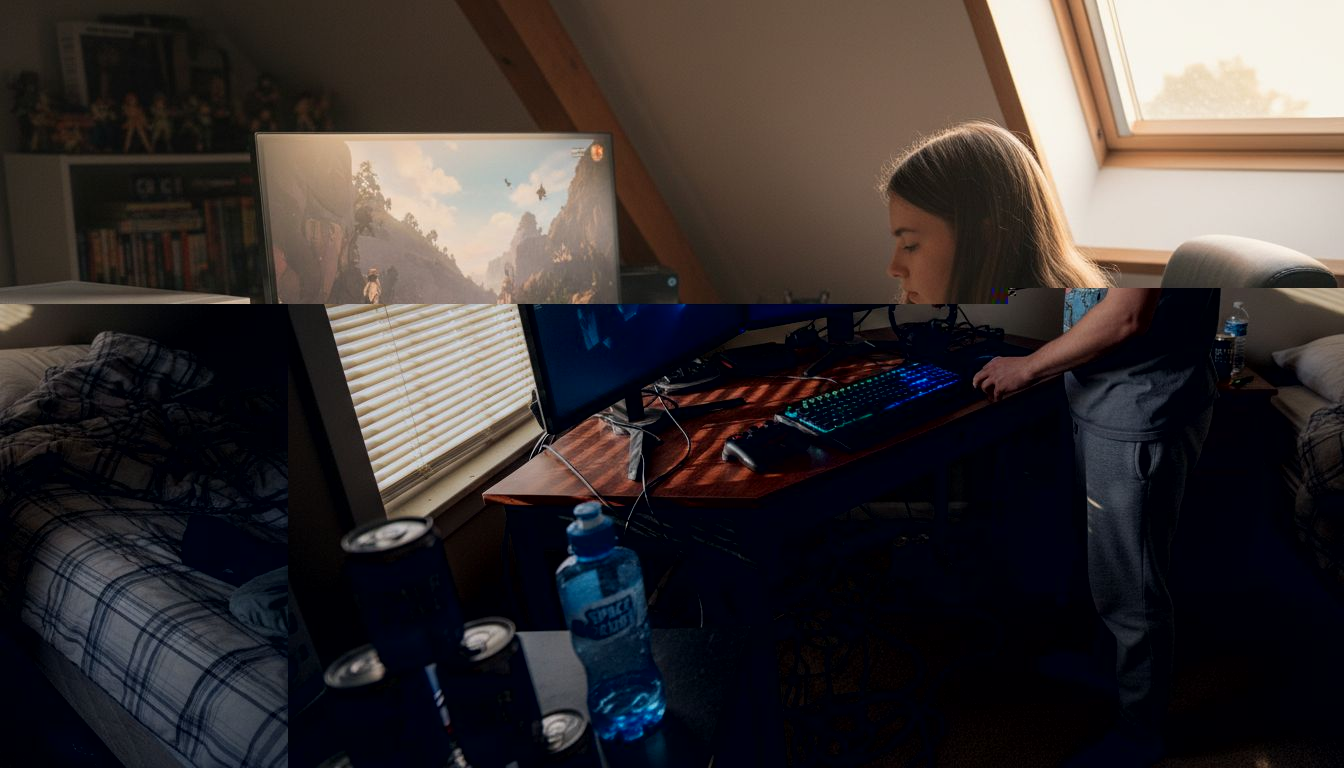
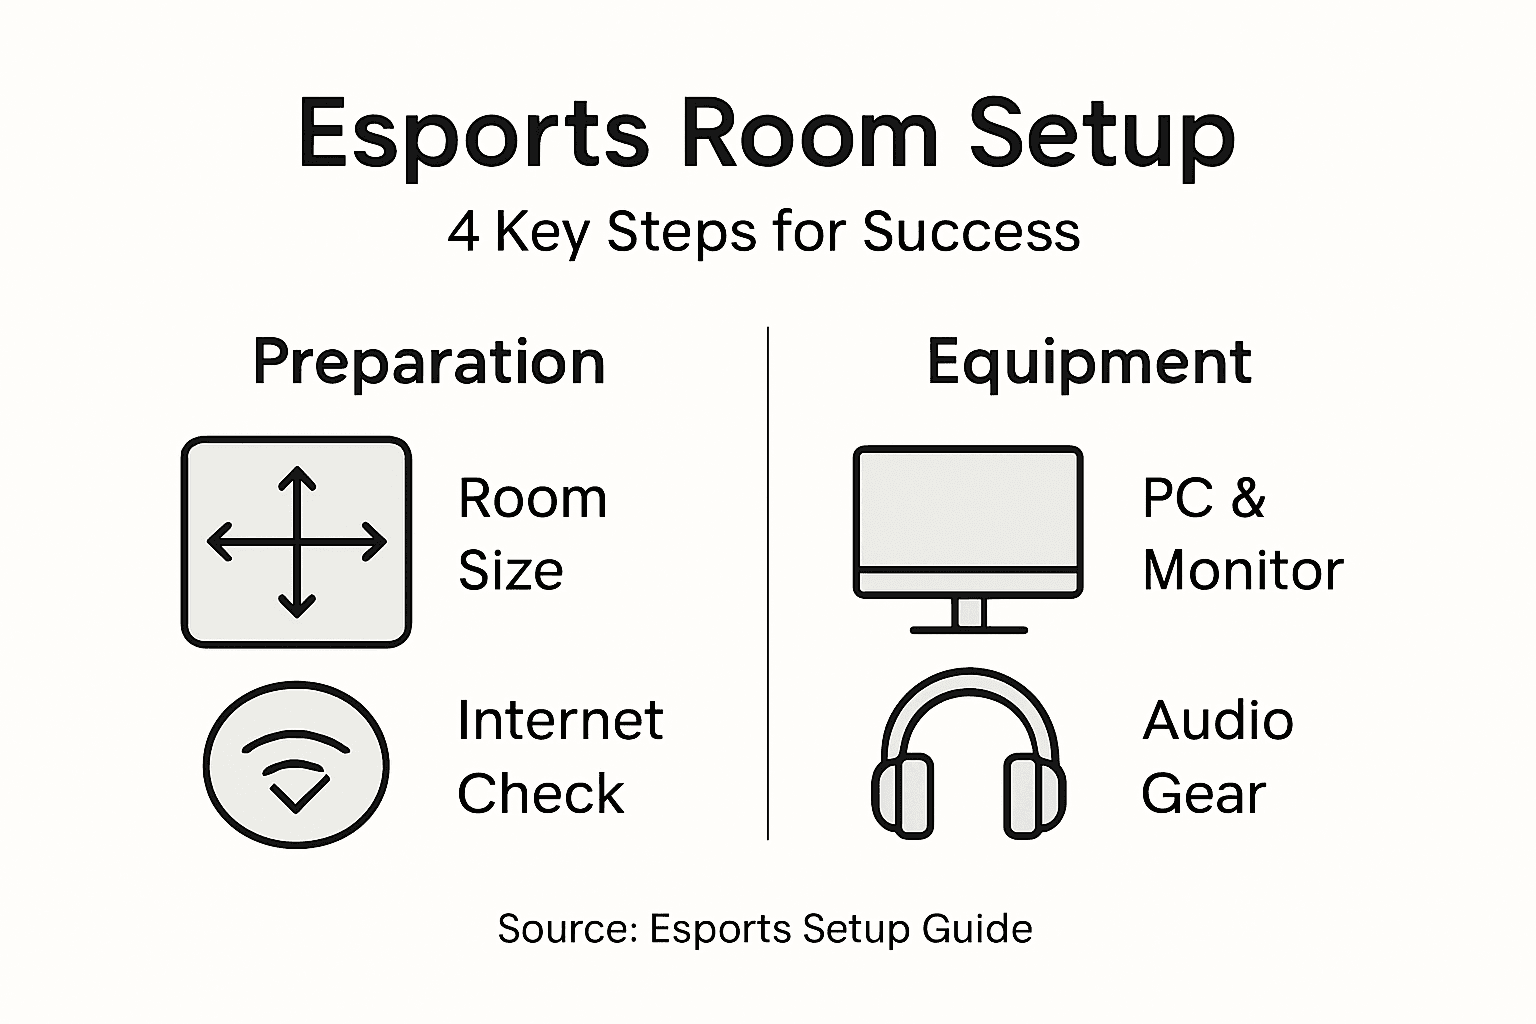
Step 1: Assess and prepare your gaming space
Before you invest in equipment or change anything, take a hard look at your current space. You need to understand what you’re working with: dimensions, power availability, lighting, and airflow. This assessment prevents costly mistakes and helps you plan strategically.
Start by measuring your gaming area and identifying where your setup will live. Consider these practical factors:
- Available desk or table space for monitor(s), keyboard, mouse, and controller
- Electrical outlets and their proximity to your gaming position
- Ventilation and air circulation to prevent equipment overheating
- Ambient lighting conditions and potential sources of glare
- Noise levels from nearby appliances, people, or traffic
Understanding spatial requirements for equipment and networking helps you plan your layout effectively. This is especially important if you’ll be upgrading to multiple monitors or adding streaming gear later.
Next, walk through your space during different times of day. Morning light creates different shadows than evening light. Notice where the sun hits your desk, how bright it gets, and whether you’ll need blinds or additional lighting. Poor lighting causes eye strain, which tanks performance during long gaming sessions.
Check your power infrastructure honestly. Do you have enough outlets without relying on daisy-chained extension cords? Are outlets positioned conveniently, or will cables run across foot traffic? Plan your power layout before you buy anything. Appropriate power supply planning is non-negotiable for esports setups.
Temperature matters more than most gamers realize. Is your space naturally cool or warm? Does your room get stuffy after an hour? Good airflow prevents your GPU from throttling and keeps you mentally sharp. If your room runs hot, plan for additional fans or consider repositioning your setup near a window or air vent.
Your physical space directly impacts your ability to compete. A poor gaming environment undermines even the best equipment.
Finally, test your internet connectivity in that exact location. Walk to where your gaming station will be and check your WiFi signal strength. Better yet, run a speed test to confirm you’ll have stable, low-latency connection where you actually play.
Pro tip: Document your space with phone photos and measurements, then sketch a rough layout on paper showing outlet locations, furniture placement, and cable routes—this becomes invaluable when troubleshooting setup problems or making future upgrades.
Here’s a comparison of key factors for an optimal gaming space:
| Factor | Why It Matters | Potential Issues | Ideal Solution |
|---|---|---|---|
| Space Size | Ensures all gear fits comfortably | Cramped layouts limit movement | Measure and plan layout |
| Power Availability | Prevents overloads and hazards | Insufficient outlets, overload | Dedicated power strip, surge protector |
| Lighting | Reduces eye strain and improves focus | Glare, shadows, fatigue | Adjustable task lighting, blinds |
| Airflow | Maintains equipment and player health | Overheating, discomfort | Use fans, avoid blocking vents |
| Internet Quality | Secures stable, low-ping connection | Lag, disconnects | Wired Ethernet or strong WiFi |
Step 2: Select and install essential gaming equipment
Now that you understand your space, it’s time to select gear that matches your needs and your room’s capabilities. The right equipment setup transforms your gaming performance and comfort during long competitive sessions.
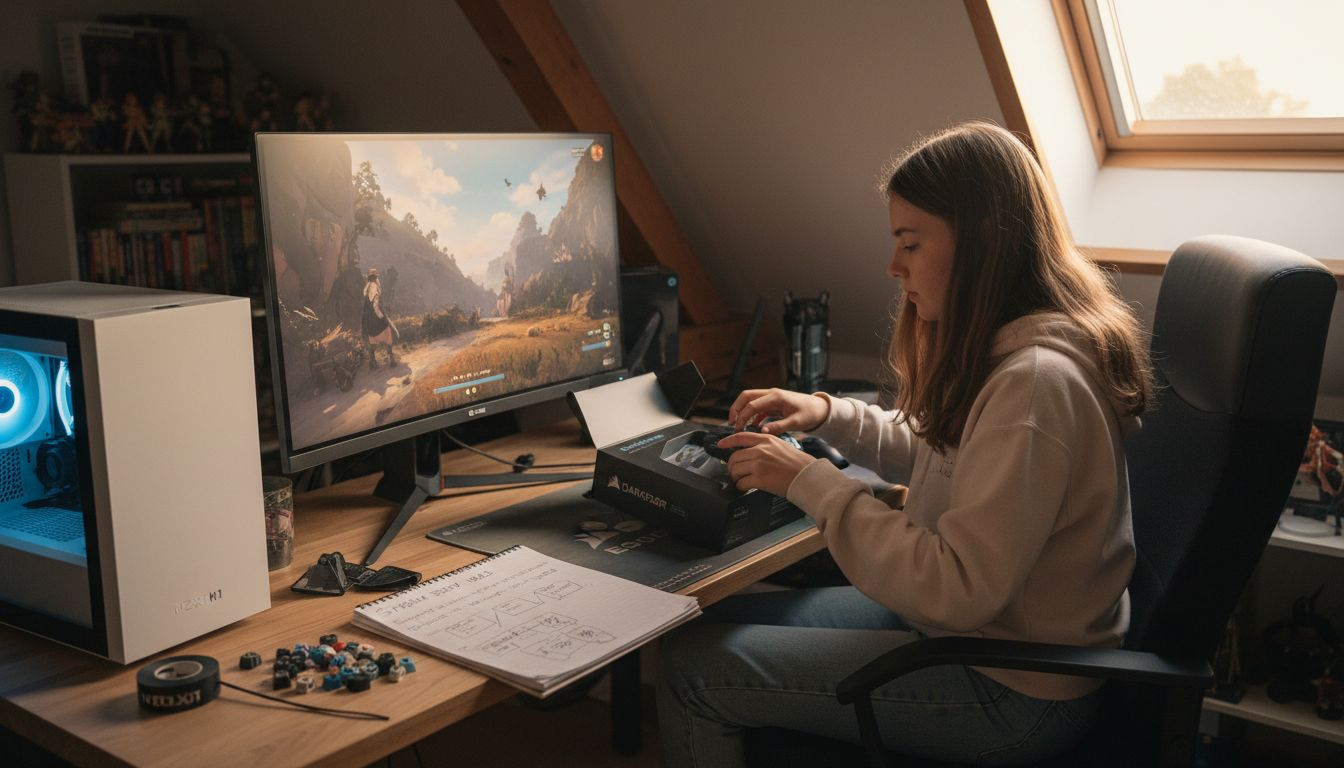
Start by prioritizing your core components. You need a reliable gaming PC or console, monitor, keyboard, mouse, and headset. Each piece directly impacts your ability to react faster and play longer without fatigue. When building your gaming PC for esports, prioritize components that deliver the frame rates and response times your competitive games demand.
Monitor selection deserves serious attention. Look for these specifications:
- Refresh rate of at least 144Hz for fast-paced games like first-person shooters
- Response time under 5 milliseconds to minimize ghosting
- Resolution that your PC can actually support without dropping frames
- Screen size appropriate for your desk distance and viewing angle
Keyboard and mouse matter more than casual gamers think. Your keyboard and mouse positioning should allow your wrists to stay straight and your arms at roughly 90-degree angles. A cheap keyboard with mushy keys or a mouse that doesn’t track accurately will cost you rounds when you need precision most.
Headset quality impacts both performance and comfort. You need audio that lets you hear footsteps, callouts, and in-game audio cues clearly. Poor audio quality turns esports events into frustrating experiences where you’re guessing at what’s happening around you.
Once you have your equipment, installation order matters. Set up your monitor first at eye level with the top of the screen at or slightly below eye height. Position your keyboard and mouse at a height where your elbows rest at roughly 90 degrees. Your chair should support your lower back without forcing you into awkward postures during intense matches.
Test everything before committing to a layout. Spend 30 minutes with your setup and adjust as needed. Your neck, shoulders, wrists, and lower back should feel neutral and comfortable, not strained.
Proper equipment setup prevents injury and gives you the physical foundation to compete at your best.
Install your networking equipment last. Make sure your router or Ethernet connection provides the stable connectivity you confirmed during your space assessment. Unstable internet ruins everything else you’ve optimized.
Pro tip: Cable manage as you install rather than after, using clips and ties to keep cables organized and out of your way—this prevents tripping hazards and makes future upgrades much faster.
The table below summarizes how to prioritize and select essential gaming equipment for maximum impact:
| Equipment | Selection Focus | Setup Priority |
|---|---|---|
| Gaming PC/Console | High frame rates, reliability | First, central component |
| Monitor | Refresh rate, resolution | Eye level, minimal glare |
| Keyboard/Mouse | Comfort, response | Ergonomic alignment |
| Headset | Audio clarity, comfort | Adjust for long sessions |
| Networking | Stability, speed | Install last, test thoroughly |
Step 3: Optimize hardware and software settings
Your equipment is installed, but default settings rarely work best for competitive gaming. Fine-tuning your hardware and software configuration can shave milliseconds off your reaction time and improve your overall performance significantly.
Start with your monitor settings. Most gamers leave their monitors on factory defaults, which is a missed opportunity. Adjust your refresh rate to the maximum your monitor supports, then confirm your graphics card is actually outputting that many frames. Reducing motion blur and disabling any “motion smoothing” features helps you track moving targets more accurately.
Next, optimize your graphics driver settings. Your GPU manufacturer releases regular updates that improve performance. Check for driver updates monthly. When configuring in-game graphics, prioritize these settings:
- Frame rate over visual quality when competing
- Lower resolution if it means consistent 144+ frames per second
- Turn off ray tracing and fancy effects during competitive matches
- Reduce input lag by disabling vsync unless you’re experiencing screen tearing
Input lag determines whether you win or lose duels. Hardware settings like monitor refresh rates and input latency directly impact how quickly your actions register in-game. Test your settings by playing a few warm-up matches and noting if your character responds instantly to your commands.
Your mouse and keyboard need attention too. Disable mouse acceleration and set your DPI to a sensitivity level that feels natural after 30 minutes of practice. Most competitive players use between 400 and 800 DPI. Higher sensitivity lets you turn faster but sacrifices accuracy at distance. Lower sensitivity improves precision but requires more arm movement.
Software optimization goes beyond graphics. Close unnecessary programs running in the background that consume CPU or RAM. Streaming services, Discord, and browser tabs all steal resources your game needs. Use data-driven strategies for optimization by tracking your frame rates and input lag before and after each setting change.
The best settings are the ones you practice with consistently, not necessarily the absolute fastest possible configuration.
Audio settings matter too. Disable any surround sound processing if it adds latency. Use headphones instead of speakers to eliminate room echo and hear directional audio cues clearly. Test your audio by playing a few rounds and confirming you can pinpoint enemy locations by sound.
Pro tip: Create separate game profiles for different titles and save your optimal settings for each one, then screenshot your exact settings to recreate them instantly if something breaks or you reinstall your operating system.
Step 4: Test and fine-tune your gaming environment
Your setup is complete on paper, but real-world testing reveals what actually works. This step separates gamers who perform consistently from those who struggle with unreliable setups. Spend time playing in your environment and documenting what needs adjustment.
Start with extended gameplay sessions. Play for at least two hours in your gaming space during the times you’ll actually compete. Notice what feels uncomfortable, what distracts you, and where your performance dips. That tightness in your neck after an hour means your monitor sits too low. That eye strain means you need different lighting. That frustration with delayed response means your settings need more tweaking.
Create a testing checklist to track your observations:
- Monitor positioning and whether glare affects visibility
- Seating comfort during long practice sessions
- Temperature and whether you feel too hot or cold
- Keyboard and mouse responsiveness without lag or stuttering
- Audio clarity for hearing directional information
- Network stability with consistent ping and no disconnections
Measure your actual performance metrics. Record your frame rates using built-in tools and note any stutters or frame drops. Check your network latency using online ping tests. Rigorous testing procedures for system performance and latency ensure your setup meets competitive standards, not just your casual expectations.
Test under pressure too. Host a practice match with friends or join a community tournament. Your equipment behaves differently under stress when your adrenaline is high and your focus is intense. This reveals real problems that casual play won’t expose.
Adjust one variable at a time. If you change your monitor height, mouse sensitivity, and graphics settings simultaneously, you won’t know which adjustment actually helped. Tweak something, play for 30 minutes, evaluate, then move to the next variable.
Document everything that works. Screenshot your settings, write down monitor height and chair position, note your mouse DPI and polling rate. Continuous testing and refinement of the gaming environment builds knowledge that you carry to competitions.
Small improvements compound. Shaving 5 milliseconds of latency here and fixing one source of distraction there creates a dramatically better competitive experience.
Schedule regular testing sessions monthly. Your priorities might shift as you improve. Settings that felt perfect three months ago might need adjustment as your skill increases and your understanding deepens.
Pro tip: Create a video of your setup walkthrough showing monitor height, chair position, cable routing, and software settings, then review it before competitions to recreate your exact optimal configuration instantly.
Build Your Ultimate Gaming Environment with GZone Pro
Setting up the perfect gaming environment is crucial to stay competitive and comfortable in esports. From optimizing your power supply and ambient lighting to selecting ergonomic equipment and fine-tuning software settings, every detail matters to reduce latency, prevent fatigue, and sharpen your focus. If you are ready to transform your setup beyond the basics, GZone Pro offers expert guides and trusted reviews tailored to help you master every step.
Explore essential tips on building a high-performance gaming PC, discover headset recommendations that deliver crystal-clear audio, and dive into detailed tutorials that walk you through ergonomic placements and hardware optimizations. Don’t let unknown variables hold back your potential. Visit GZone Pro now to access the knowledge and equipment insights you need to elevate your esports setup today.
Frequently Asked Questions
How do I assess my gaming space for esports?
To assess your gaming space, measure the dimensions and check for available power outlets, lighting conditions, and airflow. Document everything and sketch a layout to visualize the best fit for your equipment and ensure a competitive edge.
What essential equipment should I prioritize for my esports setup?
Prioritize a reliable gaming PC or console, a high-refresh-rate monitor, a responsive keyboard and mouse, and a quality headset. Focus on selecting components that enhance your gameplay performance and comfort.
What settings should I optimize on my gaming monitor?
Optimize your gaming monitor by adjusting the refresh rate to the maximum supported and reducing motion blur. Confirm output from your graphics card matches your settings for the best visual performance during gameplay.
How can I test my gaming environment effectively?
To test your gaming environment, engage in extended gameplay sessions to identify any discomforts or distractions. Keep a checklist of observations and make adjustments based on your experience during these test sessions.
How often should I review and fine-tune my gaming setup?
Review and fine-tune your gaming setup monthly, as your needs and skills may evolve over time. Schedule regular testing sessions to ensure your configuration remains optimal for competitive gaming performance.
What steps should I take to optimize hardware and software settings?
Begin by updating your graphics drivers and configuring in-game graphics for maximum frame rates. Test various settings regarding input lag and responsiveness to find the most effective configuration for your gaming style.